End of Tenancy Cleaning: A Practical Approach to Getting Your Deposit Back
What End of Tenancy Cleaning Really Means
End of tenancy cleaning is the deep, detailed clean carried out when a tenant moves out of a rented property. It goes far beyond regular housekeeping and focuses on returning the home to the condition expected at the start of a tenancy, allowing for fair wear and tear. For many renters, end of tenancy cleaning is closely linked to deposit protection, inspection outcomes, and the overall handover process.
Landlords, letting agents, and inventory clerks often compare the property against the original check-in report. That means every room, fixture, fitting, and surface can be assessed. A proper end of tenancy cleaning process helps reduce disputes, saves time during the final inspection, and creates a cleaner, more professional handover.
Many people search for end of tenancy cleaning only when move-out day is near, but the smartest approach is to plan ahead. The earlier you start, the easier it becomes to manage appliances, windows, skirting boards, bathrooms, and kitchen grease without feeling rushed.
Why End of Tenancy Cleaning Matters
Moving out can be stressful, and cleaning is often the task that causes the most pressure. A well-executed end of tenancy cleaning can make the difference between a smooth deposit return and a frustrating deduction. Even when a property looks tidy, hidden dirt in ovens, cupboards, limescale on taps, or dust behind furniture can affect the inspection result.
For tenants, the main benefit is financial. A deposit is a significant amount of money, and landlords may deduct cleaning costs if the property does not meet the expected standard. For landlords and agents, a professionally cleaned property is easier to re-let, photographs better for listings, and creates a stronger first impression for new occupants.
There is also a practical value to end of tenancy cleaning. It reduces the burden on the next tenant, supports a fair tenancy transition, and helps keep the rental market functioning efficiently. In many cases, it is simply the most respectful way to leave a property after living in it.
Areas Typically Covered in End of Tenancy Cleaning
Every property is different, but most end of tenancy cleaning checklists include the same core areas. The focus is on deep cleaning rather than surface tidying, with attention to corners, edges, and commonly overlooked places.
- Kitchen: ovens, hobs, extractor fans, cupboards, splashbacks, sinks, taps, tiles, and floor surfaces
- Bathrooms: toilets, baths, showers, grout, mirrors, glass screens, limescale, drains, and vents
- Living areas: skirting boards, light switches, doors, frames, shelves, radiators, and flooring
- Bedrooms: wardrobes, drawers, under beds, internal windowsills, and curtain rails
- Throughout the property: dust removal, vacuuming, mopping, stain treatment, and cobweb removal
End of tenancy cleaning often also includes washing interior windows, wiping appliances, polishing fixtures, and making sure no trash or personal items are left behind. If carpets are included in the rental agreement, they may require a deeper treatment as well.
It is important to read the tenancy agreement carefully. Some properties require specific tasks, such as professional carpet cleaning or treatment of upholstered items. Following those requirements makes the end of tenancy cleaning process much easier to defend if questions arise later.
How to Prepare Before You Start
Preparation is one of the most overlooked parts of end of tenancy cleaning. Before you begin scrubbing, remove all personal belongings, check cupboards and drawers, and dispose of rubbish. Once the property is empty, you can see what truly needs attention.
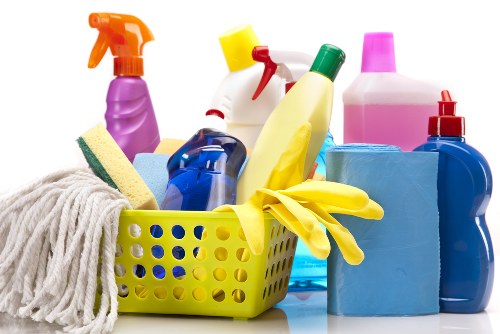
It helps to gather supplies in advance. Common items for end of tenancy cleaning include microfiber cloths, sponges, disinfectant, degreaser, glass cleaner, toilet cleaner, limescale remover, gloves, a mop, vacuum cleaner, and a step stool if needed. Using the right tools saves time and improves results.
Another useful step is to document the property before cleaning. Take photos of existing marks, damage, or stubborn stains so that you can separate cleaning issues from fair wear and tear. This can be especially useful during the final checkout inspection.
Simple Preparation Checklist
- Remove all belongings from every room
- Defrost and empty the fridge and freezer
- Unplug appliances safely where possible
- Open windows to improve ventilation
- Check the tenancy agreement for special cleaning clauses
- Set aside time for drying and finishing touches
Room-by-Room Focus for Better Results
A room-by-room approach is the best way to manage end of tenancy cleaning without missing details. Working systematically makes the process more efficient and helps ensure every area reaches a consistent standard.
In the kitchen, start with the toughest task: the oven. Grease, burnt-on residue, and food stains are common reasons for cleaning deductions. Next, clean cupboards inside and out, remove crumbs from drawers, degrease the hob, and wipe appliances such as the fridge, microwave, and dishwasher. Pay attention to handles, seals, and kickboards.
In bathrooms, tackle limescale on taps, showerheads, screens, and tiles. Use a suitable cleaner for grout and ensure the toilet, basin, bath, and all fittings are spotless. End of tenancy cleaning in bathrooms should also include mirrors, extractor fans, and any mould-prone corners.
Living Rooms and Bedrooms
Living rooms and bedrooms may appear easier, but they still require careful attention. Dust behind radiators, along skirting boards, on shelves, and around sockets. Vacuum carpets thoroughly and clean hard flooring with the appropriate product. If there are marks on walls or doors, remove them gently without causing damage.
In bedrooms, empty wardrobes and drawers completely and wipe them down inside. Check under beds, around bed frames, and behind furniture for dust and debris. Curtains, blinds, and windowsills also deserve attention during end of tenancy cleaning.
It is a good idea to leave each room with a fresh, neutral appearance. Even if you are not repainting, removing stains, fingerprints, and dust makes the whole property feel cleaner and better maintained. This attention to detail can support a smoother inspection outcome.
Frequently Missed Areas
- Top edges of doors and door frames
- Light fittings and lampshades
- Behind and under large furniture
- Inside vents and extractor covers
- Window tracks and seals
- Skirting board corners
Kitchen Cleaning Tips That Make a Big Difference
The kitchen is often the most demanding part of end of tenancy cleaning. Because it is used daily, grease and grime build up in places that are easy to ignore during routine cleaning. A detailed kitchen clean can dramatically improve the overall condition of the property.
Begin with the oven and hob. Remove shelves and trays where possible, soak them if necessary, and use a strong but safe degreaser. Clean the inside of the oven door, the glass, and the seals. For the hob, remove burnt food residue and polish the surface so it looks presentable.
Next, handle the sink and taps. Limescale, soap marks, and food stains can make a kitchen look neglected even if the rest of the room is clean. Wipe cabinet doors, clean the backsplash, and check behind appliances. End of tenancy cleaning often succeeds or fails in the kitchen because small details are highly visible here.
Kitchen Priorities
- Oven, hob, and extractor fan
- Fridge, freezer, and microwave
- Cupboards, drawers, and shelves
- Sink, taps, and draining area
- Floors, corners, and skirting boards
Bathroom Standards Expected at Move-Out
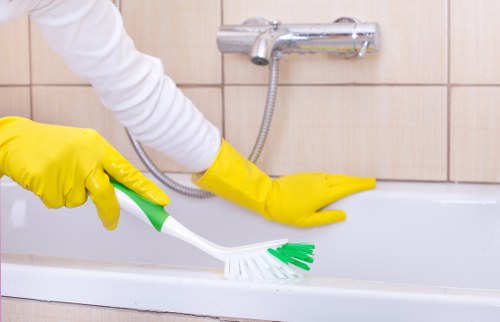
Bathrooms must usually be cleaned to a very high standard during end of tenancy cleaning. Because moisture leads to limescale, soap scum, and potential mould growth, this room often needs extra time and careful product selection.
Work from top to bottom. Start with mirrors, shelves, and light fixtures, then move to the shower, bath, sink, and toilet. Clean grout lines, polish taps, and ensure all glass surfaces are streak-free. If mould is present, treat it safely and thoroughly, but avoid damaging tiles or sealant.
Good ventilation matters too. A dry, fresh bathroom is less likely to produce inspection concerns. Leave doors open where appropriate and make sure towels, mats, and personal items are removed. The more neutral and hygienic the room feels, the better the impression.
End of tenancy cleaning in bathrooms should also include drains, vents, and hidden ledges. These are easy to forget but frequently checked. A spotless toilet and a gleaming sink are essential, but the smaller areas often help determine whether the room passes inspection without issue.
Should You Hire Professionals or Do It Yourself?
One of the biggest decisions during end of tenancy cleaning is whether to clean the property yourself or hire professional cleaners. The answer depends on your schedule, energy, budget, and the standard required by the tenancy agreement.
DIY cleaning can save money, especially if the property is in good condition and you have time to do the job properly. However, it also requires effort, equipment, and a strong eye for detail. If you miss an important area, the cost of a deposit deduction may outweigh the savings.
Professional end of tenancy cleaning services are often preferred by tenants who want convenience and a high standard of finish. Experienced cleaners know what landlords and agents look for, and they usually work faster and more thoroughly than a rushed move-out clean. For properties with ovens, carpets, and heavy use, professional help can be worthwhile.
DIY vs Professional Cleaning
- DIY: lower cost, flexible timing, more personal control
- Professional: higher standard, less stress, time-saving, often includes receipts or guarantees
- Best choice: depends on property size, condition, and tenancy requirements
How Long End of Tenancy Cleaning Usually Takes
Time is another important factor in end of tenancy cleaning. A small flat in decent condition may take a few hours, while a larger home with heavily used appliances and carpets can take a full day or more. The exact timing depends on the level of dirt, the number of rooms, and whether you are working alone or with help.
Planning the clean room by room is the most efficient method. Start with the kitchen and bathroom because they usually take the most effort, then move through the living areas and bedrooms. Leaving floors until last helps prevent re-soiling after dusting and surface cleaning.
If you are cleaning after packing and moving, fatigue is also a factor. Many tenants underestimate how tiring move-out day can be. That is why many people choose to book a service in advance or split the work across several days. Proper planning makes end of tenancy cleaning less overwhelming and more effective.
Common Mistakes to Avoid
Even careful tenants can make mistakes during end of tenancy cleaning. The most common problem is focusing on visible surfaces while ignoring hidden areas. Under sofas, inside appliances, on top of cupboards, and behind toilets are all spots that can be checked during an inspection.
Another mistake is using the wrong cleaner for a surface. Harsh chemicals can damage laminate, wood, stone, or painted finishes. Always test products carefully and follow instructions. Similarly, using too much water on floors or carpets can cause drying problems and leave the property in poor condition.
Rushing the final stage is also risky. A final walkthrough should include checking lights, switches, window latches, bins, and any areas you may have missed. End of tenancy cleaning is not complete until the property looks tidy, smells fresh, and presents well from corner to corner.
Top Mistakes to Avoid
- Leaving cleaning until the last minute
- Ignoring inside cupboards and drawers
- Forgetting appliances and vents
- Using unsuitable products on delicate surfaces
- Skipping the final inspection walkthrough
How to Improve Your Chances of a Full Deposit Return
The goal of end of tenancy cleaning is not just to make a place look neat. It is to meet the expectations of the tenancy agreement and the property’s original condition report. To improve your chances of a full deposit return, combine thorough cleaning with good documentation and timely communication.
Start by reviewing your inventory check-in report, if you have one. This helps you understand what the landlord will compare against. Then focus on areas that are clearly marked as needing attention, such as stains, limescale, or damage. A proactive approach makes a strong difference.
If you notice issues that are beyond cleaning, such as damaged blinds or broken fixtures, report them appropriately instead of hoping they go unnoticed. Honesty combined with strong end of tenancy cleaning can build trust and reduce the chance of disputes. Clean properties are easier to assess fairly.
Deposit Protection Tips
- Follow the tenancy agreement closely
- Keep receipts for professional cleaning if used
- Take before-and-after photos
- Complete repairs or report damage early
- Leave the property empty and ready for inspection
End of Tenancy Cleaning for Landlords and Letting Agents
Landlords and letting agents also benefit from understanding end of tenancy cleaning. A clear standard helps reduce disputes, protects the property’s value, and supports quicker turnaround between tenancies. Clean properties attract better interest and can reduce vacancy periods.
When a tenant moves out, a systematic approach works best. Inspect each room against the inventory, note areas that need extra attention, and decide whether the property needs a light refresh or a full deep clean. If the previous tenant has done an adequate job, only minor work may be necessary. If not, a professional end of tenancy cleaning service may be the most efficient option.
For rental properties that change occupants frequently, setting expectations in advance is helpful. Clear tenancy terms, straightforward cleaning standards, and consistent inspections all contribute to smoother transitions. In a busy rental market, presentation matters, and cleanliness is one of the fastest ways to improve it.
What Makes a Cleaning Service Worth Booking?
If you decide to book professional end of tenancy cleaning, it helps to know what makes a service worthwhile. Experience, consistency, and a clear understanding of move-out standards matter far more than vague promises. A dependable team should know how to handle ovens, bathrooms, flooring, and the small details that are often inspected.
Look for a service that covers the key areas your tenancy agreement expects. You may also want to check whether the cleaning includes deep oven work, window cleaning, carpet treatment, or appliance cleaning. The more transparent the service, the easier it is to match it to your needs.
Good communication also matters. You should know what is included, how long the clean will take, and what results to expect. When done properly, end of tenancy cleaning removes uncertainty and gives you confidence before the final handover. If you are preparing to move, contact us today or book your service now to make the process easier.
Final Thoughts on End of Tenancy Cleaning
End of tenancy cleaning is more than a final chore; it is an important part of moving out responsibly. Whether you do it yourself or hire professionals, the objective is the same: leave the property in a clean, presentable condition that supports a fair inspection and a smooth transition.
With the right plan, the right tools, and careful attention to detail, you can handle the process confidently. Focus on the kitchen, bathrooms, hidden corners, and any areas that are most likely to be checked. A structured approach reduces stress and increases the likelihood of a successful outcome.
If you want a cleaner move-out experience, now is the right time to act. Prepare early, stay organised, and choose the option that best fits your schedule and budget. For a smooth handover and a polished finish, book your service now and take the pressure out of moving day.